
Tutorial: Add a Zipper and Lining to Your Knitted Bag
Y'all. I am not a seamstress. I have great respect for them, but I am not one of them. I have always wanted to learn to quilt, no doubt due to the genetic code relating me to this marvelous quilter. When I realized that sewing was not really my thing, I decided I would knit quilts, which is crazy and, as it turns out, totally do-able. That, however, is a blog post for another day.
Today is about using the skills you have to make things. Not being a seamstress, adding a lining to a knitted bag first sounded pretty daunting, but all it takes is few simple steps, some fabric, thread, a sewing needle and a zipper. If I can do it, so can you!
This applies to those of you who might purchase a certain pattern available today for the first time, or anyone who has ever knitted a bag and thought, If I don't line that, I'm in big trouble.
Step 1: Knit your bag. You'll want to have taken care of any blocking or weaving in ends before you get to the zipper + lining stage. The bag shown is a small, flat accessory bag, but you can add linings and zippers to larger bags as well. Just size it all up!
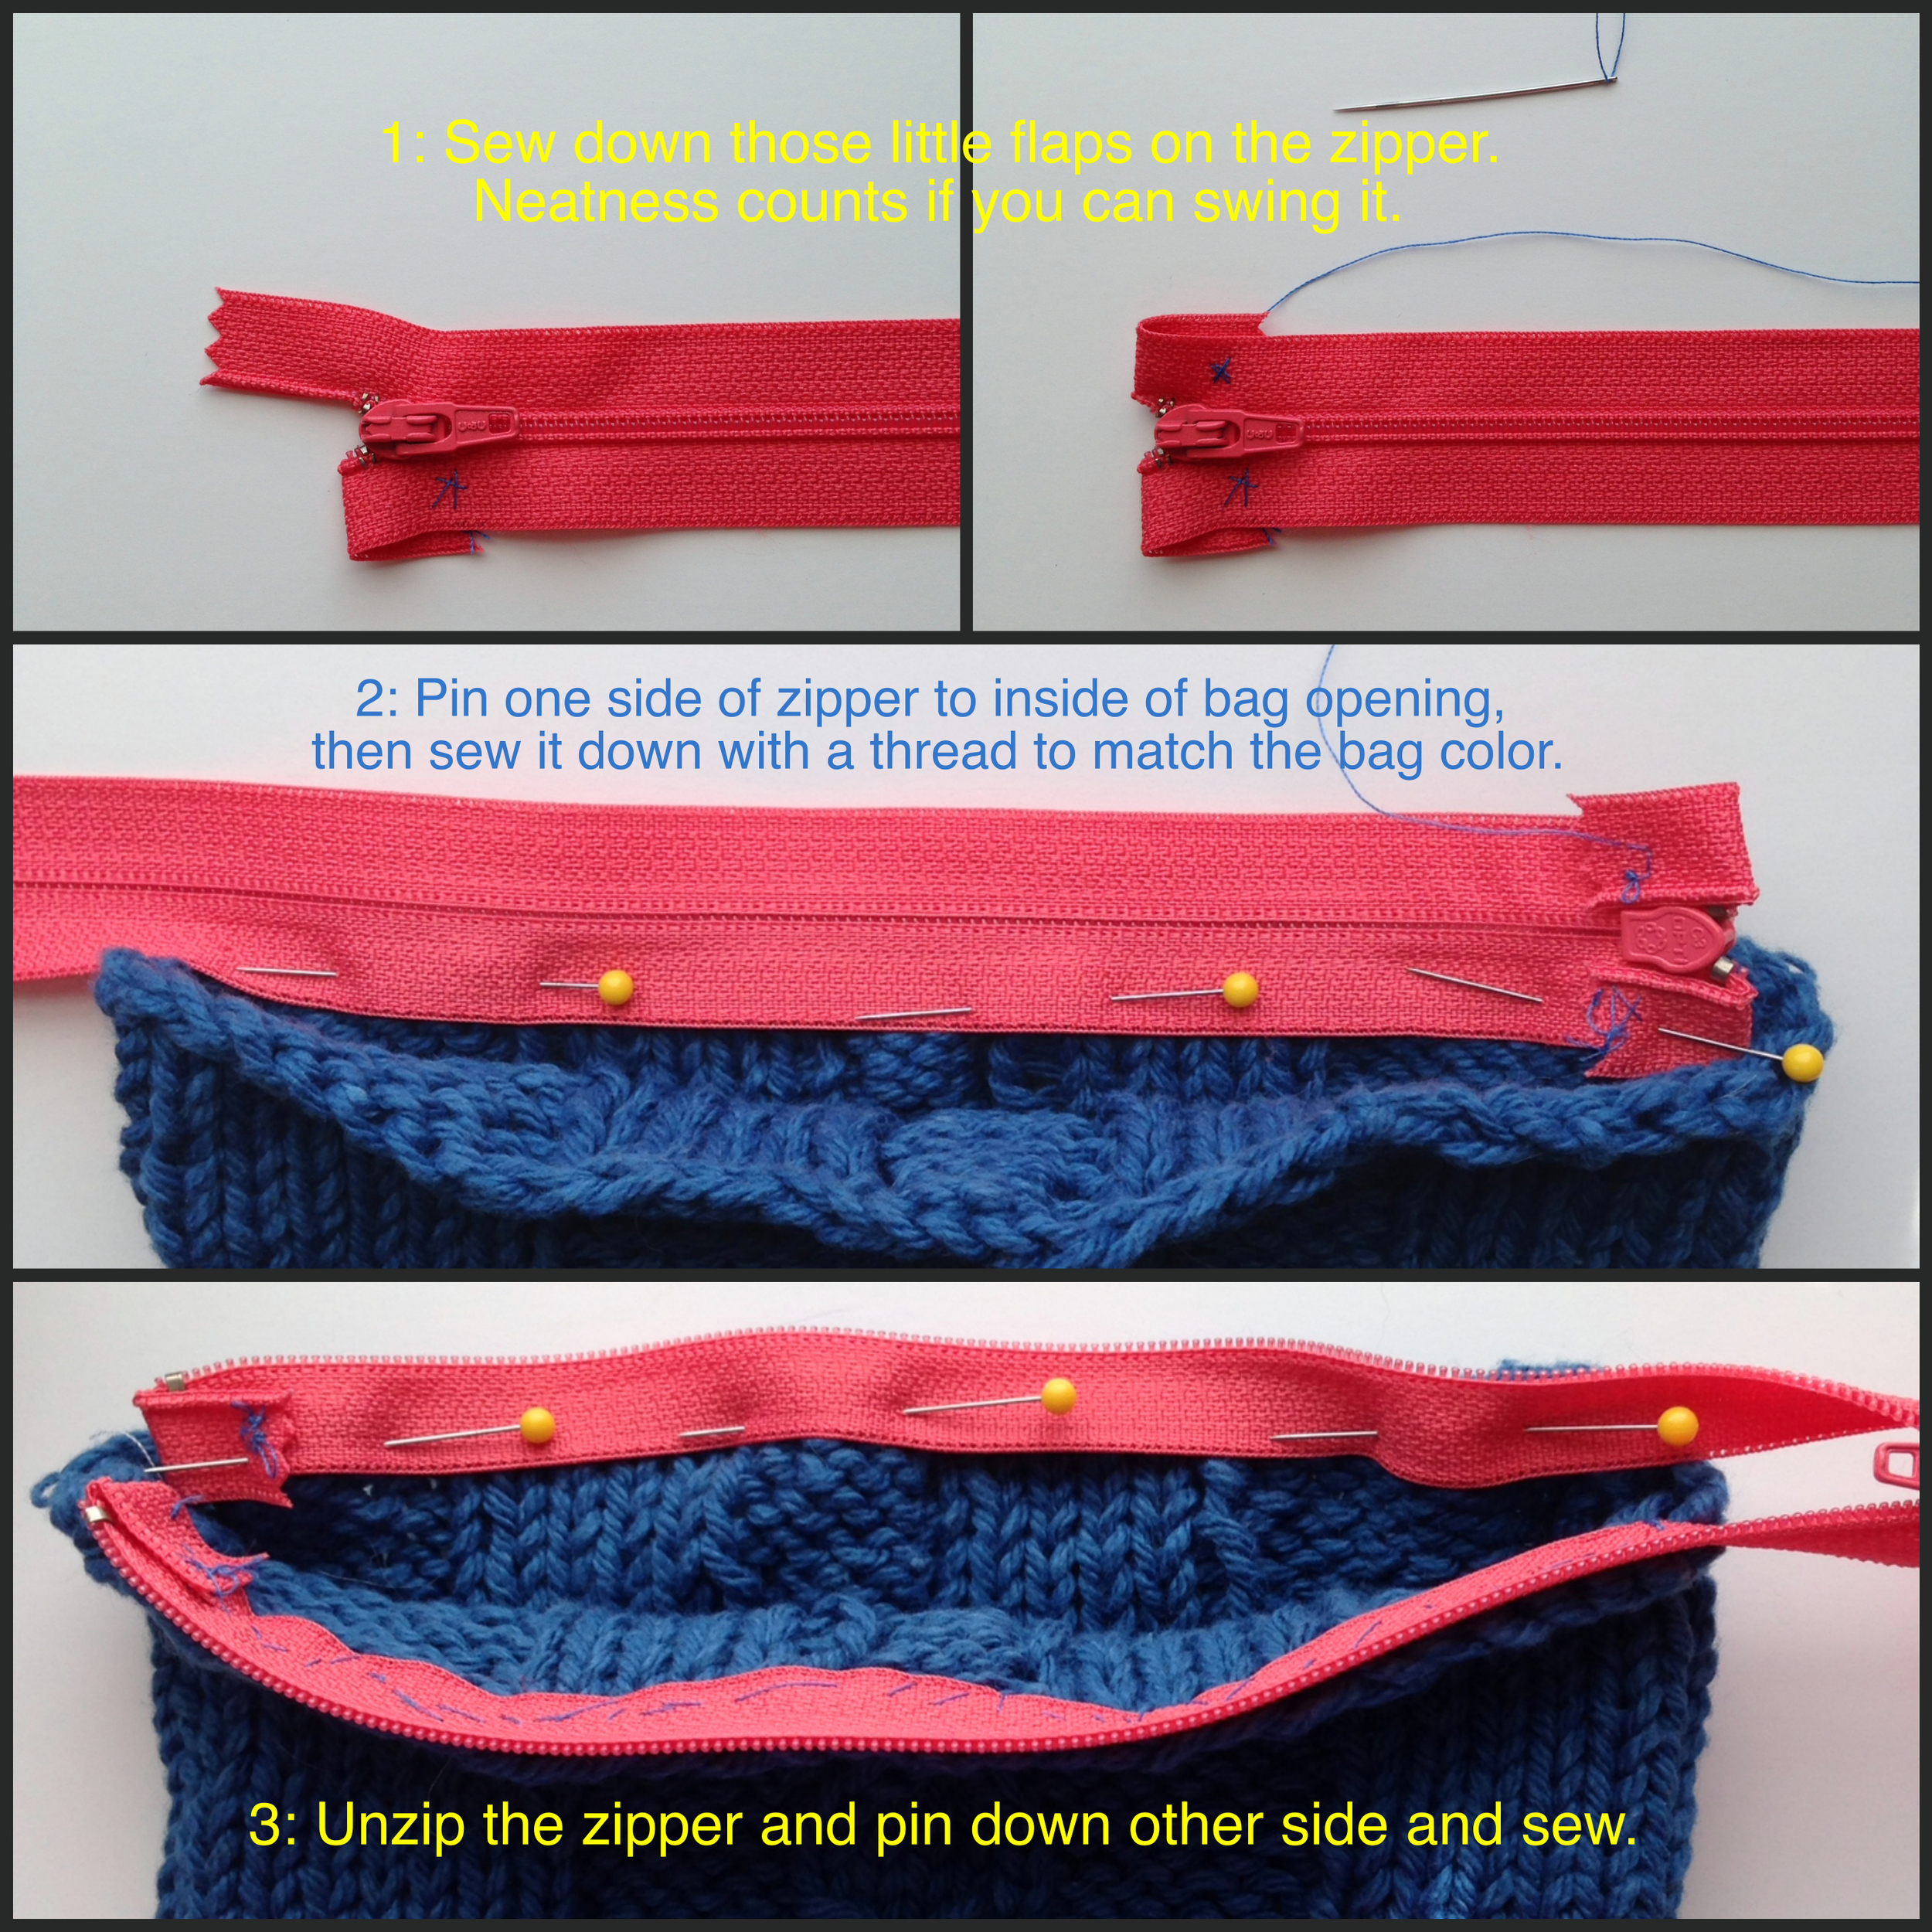
Step 2: Add a zipper like this:
Step 3: Sew a lining by hand (or by machine, if you have access to a teenager with a sewing machine and the mad skills to use one). In some cases your lining fabric might need to be trimmed to size. If that fabric is hand-dyed Shibori tie-dye indigo, save the scraps and make something small.

Step 4: Add the lining to the bag. Remember how you folded down the top edges of the lining? Pin it in to the bag and sew to the zipper so you will have a hem in one easy step (along with a lining sewn to a zipper). The end of the zipper (they always seem too big, but I might be overcompensating when I buy them. Hush.) will need to be tucked down in between the bag and the lining. Out of sight, out of mind.

Step 5: Enjoy! I also add a tassel or zipper pull to the end of my zipper. Some choices in that department include: a tassel, some i-cord, a crochet chain, and a braid. Also a post for another day!
I hope this brief, very amateur foray into sewing was helpful for you. My apologies to the talented seamstresses out there who might have cringed through this tutorial, but this is for those of us who knit our quilts, remember?
The patterns for the bags pictured will be available soon in my Ravelry shop, if you haven't already bought yours at SAFF!